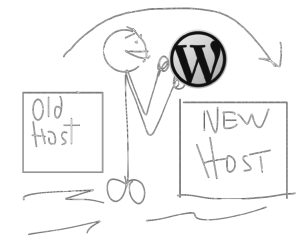
WordPress website migration, host migration, however you refer to it, can sound scary. With Cap Web Solutions as your partner, your WordPress website migration will be a straightforward process, following an established plan using a short, predictable checklist.
Here is a quick overview of the process we’ll be using to migrate your website from it’s current host to a new hosting plan with Cap Web WPcare Managed Hosting. Some of these steps can be completed quickly without any input from the website owner, some need access to your current host, and one just requires a “sit-back-and-wait” approach.
Migration Checklist
- Make sure that your WordPress website is up-to-date. This means that WordPress core, the active theme, and all active plugins are at the latest release. If they are not, they must be updated prior to the start of the migration process.
- Note: The website owner can handle this, or Cap Web can do it as part of the migration (provided the required updates are not more than 2 releases of date).

- Note: The website owner can handle this, or Cap Web can do it as part of the migration (provided the required updates are not more than 2 releases of date).
- Create an “as-is” backup of your current website using your host’s on-demand backup functionality. This provides a proven restore point should the need exist to go back to the way things were at the start. If your host does not have an on-demand option Cap Web Solutions will create the backup using an alternative tool. The backup tool will be removed from your site prior to the migration.
- Requires: Current Hosting Service cpanel, plesk, control panel access using your account username and password. Use this form (Section C) to provide this information securely to Cap Web.
- Install migration plugin and begin data move. This plugin helps in the actual move of the data from your current hosting server to your new virtual private server (VPS) at Cap Web WPcare Managed Hosting.
- Import existing database and convert for the new host. Your WordPress website resides in a database. All of the database entries must be updated to properly reflect the new address of the data and files.
- Verify migration of data and files is successful. Cap Web will review the new installation of your website on your new hosting server. You may be asked to review the website, which is now sitting on a temporary domain.
- Note that at this point there are TWO versions of your website – one is live and active on your old host, and a temporary-named one is running on your new website host. The content of the sites are identical and they should look the same.
- Point your website traffic to your new home on the interwebs. This is the point were Cap Web will access your domain registrar (where you manage your domain renewals), to update the DNS (domain name system) entries.
- Requires: Current domain registrar account credentials – username and password. Use this form (Section D) to provide this information securely to Cap Web. If you host your website where you purchased your domain, this information is the same as above and is not needed again.
- The DNS controls where your visitors are sent when they type your URL in their web browser.
- DNS changes can sometimes take up to 48 hours to propagate throughout the internet’s major traffic centers. Your website traffic may be interrupted for short periods of time during this process.
- Sit back, smile and breathe a sigh of relief that your website is now running on one of the most secure, WordPress optimized web hosting services available.

To properly perform your WordPress website migration, Cap Web Solutions will need bits and pieces of informaiton from the website owner. When you are asked to share access credentials (username and/or password) to any of the services you use with your current hosting provider, please use the secure information request form to provide this information as opposed to using plain ol’ insecure email. We have that little ‘s’ in our website address for a reason. Be assured that this site is protected by a current SSL certificate ensuring that your information is properly secured and encrypted as it travels from your computer to our website.
